There is a lot that goes into getting your first Skell, such as defeating hard enemies and gathering materials. I’ll explain each exam so that you’ll know what to do when the time comes to get your Skell License. Please visit my Xenoblade Chronicles X Beginner tips and tricks for more guides.
This guide will go over unlocking Skells in Xenoblade Chronicles X including:
Skell Unlock Requirements - What you need to unlock the ability to use Skells. Proficiency Exams - How to complete all of the Skell Proficiency Exams.
Skell Unlock Requirements
There are 2 lengthy requirements before you can start using Skells.
Complete the Chapter 6 story mission. Complete the 8 Proficiency Exams to get your Skell License.
Chapter 6 is about halfway through the story, and each story mission has several requirements before you can complete them.
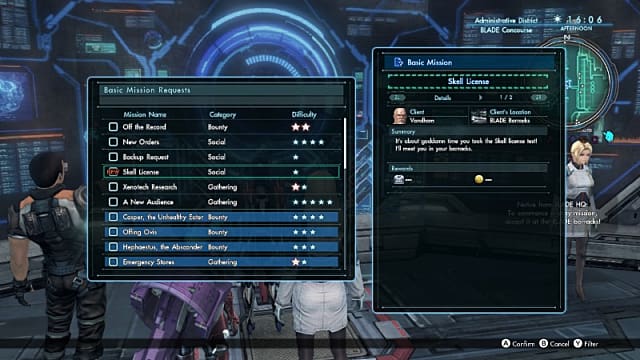
Each exam comes from one of the 8 Divisions in New LA, and they all deal with the specialty of that Division. You get the missions all at once by accepting the Skell License mission from the Basic Mission Terminal. Just go to barracks to talk to the commander to start them.
I suggest that you get to level 20-25 at least to complete all the missions.
Proficiency Exams
Proficiency Exam 1
This Pathfinder mission requires you to install a data probe in Primordia.
Install a data probe at FrontierNav site 117 in Primordia.
You might have this one already, and the mission will complete automatically after you collect them all. If not, it is northeast of the city.
Proficiency Exam 2
This Interceptors mission requires you to defeat several enemies in Noctilum.
Defeat 12 blitz blattas in Noctilum.
Just use your map to travel to one of the location nears the objective markers. Use the Follow Ball to take you directly to their locations.
Proficiency Exam 3
This Harriers mission requires you to defeat a level 25 Tyrant in Primordia.
Defeat Shatskikh, the Flash in Primordia’s Northpointe Cove.
You can look on the map, then use the Follow Ball to get to its location. It doesn’t always appear, so just fast travel away and come back until it spawns.
Proficiency Exam 4
This Reclaimers mission requires you to collect a map.
Obtain the solar starship map in Noctilum’s Humdrum Peaks.
Just use the map and follow Ball to get this one.
Proficiency Exam 5
This Curators mission requires you to gather several materials.
Gather 8 rock armadillos in Noctilum. Gather 3 bagflea squashes in Oblivia. Gather 6 multi-speckled ladybugs.
You can find these materials in the caves in each region. You can get bagflea squashes when it is raining or early morning. I suggest fast travelling to a cave during early morning grabbing items, and repeat until you get all 3.
You can go to the barracks to change the time back to early morning if needed.
Proficiency Exam 6
This Prospectors mission requires you to collect revenue from probes.
Use FrontierNav to earn over 15,000 credits in a single return.
Use the map and switch to the FrontierNav view. The bottom right shows your mining total and revenue total. You need the revenue total to be over 15,000.
You can do this easily by placing Research probes at sights that have high ranks in revenue. I would try for C or better. If you have used research probes already, you can switch probes out at anytime and get them back.
Proficiency Exam 7
This Outfitters mission requires you to test a weapon on enemies in Primordia.
Defeat 3 Giant Grexes in Primordia using a Trial Knife, Trial Assualt Rifle, or Trial Sword.
These are 3 separate objectives, but you only need to complete one. Equip any of the Trial weapons, then use your map and Follow Ball to get to the Giant Grexes.
Proficiency Exam 8
This Mediators mission requires you to complete 1 of 3 missions.
Complete “The Handy Ma-non. " Complete “The Pip-Squeak. " Complete “That’s In-Credible!”
These are all Normal Missions that you can find around New LA. You only need to complete 1 of them. I already had “That’s In-Credible!” completed so it was done as soon as I got it. That mission is from the Ma-non ship and requires you to test weapons for them.
When you’ve completed all 8, go to Walter in the Hangar at the Administrative District and answer his questions. Now move forward to start a cut-scene and get your free Skell.
That’s it for my guide on how to unlock Skells in Xenoblade Chronicles X. Let me know if you have any questions! Check out my Skell Info and Combat guide for details on using one.
